
If you ask any professional off-road cyclist about the single most transformative adjustment you can make to your rig, the answer will almost never be a costly carbon wheelset, an upgraded drivetrain, or aerodynamic handlebars. The secret to unlocking a smoother, faster, and more controlled ride costs absolutely nothing: air.
Knowing exactly how to find the best tire pressure for gravel bikes is the ultimate key to mastering the discipline. Gravel riding is a beautifully chaotic blend of smooth tarmac, rutted dirt roads, chunky limestone, and loamy forest trails. To navigate this ever-changing landscape efficiently, your tires must act as your primary suspension system, your source of traction, and your main contact point with the earth.
However, because the terrain is so wildly varied, finding the best tire pressure for gravel bikes is not a one-size-fits-all equation. It requires an understanding of physics, equipment technology, and personal riding style. In this comprehensive guide, we will break down the science of pneumatic dynamics, explore how modern rim architecture alters tire volume, and provide you with actionable steps to dial in the optimal tire pressure for your next off-road adventure.
The Paradigm Shift: Why Lower is Almost Always Better
For decades, road cyclists operated under a very simple, albeit flawed, assumption: harder tires equal faster speeds. While pumping a tire up to 100 psi on a perfectly smooth velodrome track might reduce rolling resistance, taking that same philosophy off-road is a recipe for disaster.
Balancing Rolling Resistance with Vibration Damping
When you ride on rough terrain, a rock-hard tire deflects off every pebble, root, and washboard rut. This deflection forces the bike—and your body—upwards rather than forwards. In physics, this is known as "suspension loss" or "impedance." Every time your bike bounces over a bump, forward kinetic energy is converted into vertical movement, essentially acting as a microscopic brake.
The secret to going fast on gravel is balancing rolling resistance with vibration damping. A slightly softer tire conforms to the shape of the rocks and roots, absorbing the impact rather than deflecting off it. This allows the bike to glide smoothly over the terrain, maintaining forward momentum. While a softer tire may have slightly more hysteretic rolling resistance (the energy lost as the tire casing bends), the energy saved by eliminating vibrational impedance more than makes up for it.
Why Lower Pressure Improves Off-Road Cornering Grip
Beyond speed and comfort, air pressure dictates your safety and handling. Understanding why lower pressure improves off-road cornering grip is crucial for navigating technical descents.
When you drop your psi, the tire’s contact patch—the literal amount of rubber touching the ground—lengthens and widens. A larger contact patch means more rubber interacting with the loose dirt or gravel, providing a vastly superior grip. Furthermore, lower pressure allows the tire treads to deform and bite into the terrain, rather than skipping across the top of loose gravel. When leaning into a fast, sweeping dirt corner, this larger, softer contact patch prevents the front wheel from washing out.
Symptoms of Over-Inflated Gravel Tires
If you are struggling on your local routes, your air pressure might be the culprit. The symptoms of over-inflated gravel tires are incredibly distinct once you know what to look for. They include:
- The "Ping" Effect: Rocks pinging loudly off your tires and shooting sideways.
- Chatter and Bounce: A feeling that the bike is skittering across washboard surfaces rather than tracking straight.
- Hand Numbness and Fatigue: Excessive vibrations traveling directly through the fork into your wrists and shoulders.
- Loss of Traction: The rear wheel spinning out on steep, loose climbs, or the front wheel washing out in dry, dusty corners.
Core Factors That Dictate Your Perfect PSI
To find the optimal tire pressure, you have to look at the unique variables of your setup. Your body, your wheels, and your tires all interact to create a unique pneumatic ecosystem.
How Rider Weight Affects Gravel Bike PSI
The volume of air inside your tire serves one primary purpose: to support the total system weight of the rider, the bicycle, and any gear. Therefore, understanding how rider weight affects gravel bike psi is step one.
A 130-pound rider requires significantly less air pressure to keep the tire from collapsing than a 200-pound rider. If a lightweight rider uses the pressure recommended for a heavier rider, the tire won't deform properly over bumps, resulting in a harsh ride. Conversely, if a heavier rider uses a lightweight rider's psi, the tire will bottom out on the rim, risking catastrophic damage. It is also vital to remember that weight on a bicycle is rarely distributed evenly. Typically, the rear wheel carries about 60% of the total system weight, while the front carries 40%. This is why your rear tire should almost always have 2 to 4 psi more than your front tire.
An Optimal Gravel Tire Pressure Chart by Weight
While experimentation is required to find your perfect setup, it helps to have a baseline. Below is a generalized optimal gravel tire pressure chart by weight. This chart assumes a standard 700c wheel, a 40mm tire, a tubeless setup, and mixed-surface riding conditions.
- Rider Weight: 120 lbs (54 kg) | Front: 23 psi | Rear: 25 psi
- Rider Weight: 140 lbs (63 kg) | Front: 26 psi | Rear: 28 psi
- Rider Weight: 160 lbs (72 kg) | Front: 29 psi | Rear: 31 psi
- Rider Weight: 180 lbs (81 kg) | Front: 32 psi | Rear: 34 psi
- Rider Weight: 200 lbs (90 kg) | Front: 36 psi | Rear: 38 psi
- Rider Weight: 220+ lbs (100+ kg) | Front: 39+ psi | Rear: 42+ psi
Note: These are starting points. Aggressive terrain may require slightly higher pressure to protect rims, while smooth dirt may allow for lower pressures.
Tire Sizing and the Internal Rim Width Effect on Tire Volume
Gravel bike tires come in a massive array of sizes, typically ranging from 35mm up to 50mm (or 2.1 inches). The larger the tire volume, the less pressure you need to support your weight.
Let's look at the recommended psi for 40mm gravel tires, which has become the gold standard size for most modern gravel bikes. At this width, a 160-pound rider might run 30 psi. However, if that same rider switches to a massive 50mm tire, the increased volume of air means they could easily drop down to 23 psi to achieve the exact same level of casing tension and support.
But it isn’t just the tire that dictates volume; the rim plays a massive role. The internal rim width effect on tire volume is a relatively recent phenomenon in cycling tech. Modern gravel rims are growing wider, often featuring internal widths of 23mm, 25mm, or even 27mm. When you mount a standard 40mm tire onto a wide 25mm internal rim, the tire beads are pushed further apart. This physically increases the total air volume of the tire, effectively turning a 40mm tire into a 42mm tire. Because the volume is larger, you must run lower pressure than you would if that exact same tire were mounted on an old-school, narrow 19mm rim.
Maximum Pressure Limits for Hookless Rims
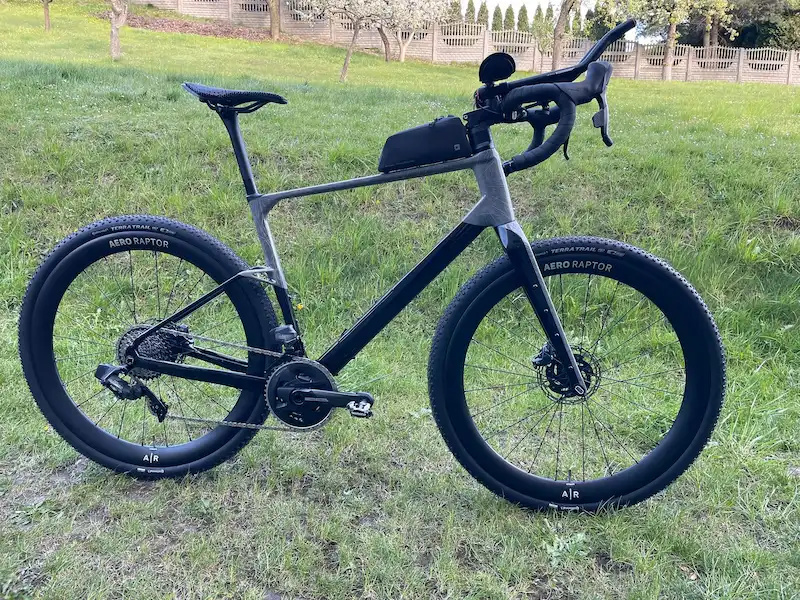
As you experiment with different setups, it is crucial to understand the safety parameters of modern wheel technology. Many high-end carbon gravel wheels now utilize a "hookless" rim profile. Traditional rims have a distinct "hook" on the inside edge that physically locks the tire bead in place. Hookless rims have straight, vertical sidewalls, relying on tight manufacturing tolerances and the unyielding strength of tubeless tire beads to stay seated.
Because there is no mechanical hook holding the tire, there are strict maximum pressure limits for hookless rims. The current industry standard dictates that you should never exceed 72.5 psi (5 bar) on a hookless rim. Exceeding this limit can cause the tire to literally blow off the rim, resulting in a dangerous crash. Fortunately, as we've already established, optimal tire pressure for gravel is generally between 25 and 45 psi, so you will rarely bump up against this hookless maximum. Nonetheless, it is a critical safety parameter to keep in mind, particularly if you swap your gravel wheels out for narrow road tires on pavement.
Tubeless vs. Inner Tubes: The Air Pressure Divide
One of the most consequential decisions you will make for your gravel bike is whether to run traditional inner tubes or upgrade to a tubeless system. Your choice heavily dictates the minimum air pressure you can safely run.
Tubeless vs Inner Tube PSI Settings
A tubeless setup relies on a sealed rim, an airtight tire casing, and liquid sealant to hold air without an inner tube. Because there is no delicate inner tube trapped between the rim and the tire, the tubeless vs inner tube psi settings vary drastically.
If you run a tubeless setup, you can safely drop your pressures into the low 20s or 30s (depending on volume and weight). This allows you to reap all the benefits of massive traction, supreme comfort, and lower rolling resistance over rough terrain.
If you are running traditional inner tubes, however, you must run significantly higher pressures—often 5 to 10 psi higher than a tubeless setup—to prevent a specific type of puncture known as a pinch flat.
How to Prevent Pinch Flats on Off-Road Terrain
A pinch flat (often called a "snakebite" puncture) occurs when you hit a sharp rock, root, or pothole with enough force that the tire bottoms out against the metal or carbon rim. If you are running inner tubes, the tube is violently pinched between the rim and the rock, resulting in two distinct parallel holes.
If you choose to ride with tubes, learning how to prevent pinch flats on off-road terrain is a matter of compromise. You must artificially inflate your tires higher than the optimal performance pressure to ensure the tire never bottoms out. While this prevents flats, it results in a harsher ride with less grip.
For tubeless riders, pinch flats are essentially eliminated because there is no tube to pinch. However, hitting the rim incredibly hard on a tubeless setup can still cut the actual tire casing or damage a carbon wheel. To prevent this in extremely rocky, aggressive terrain, many tubeless gravel riders insert foam tire liners (like CushCore). These lightweight foam inserts sit inside the tire, acting as a bumper that absorbs massive impacts, allowing riders to run astonishingly low pressures without fear of rim damage.
The Tech Behind the Tires: Casings and Construction
Not all 40mm gravel tires are created equal. The physical construction of the tire casing dictates how the tire behaves, how it rolls, and how it responds to air pressure.
High TPI Tire Casing Suppleness Benefits
Tire casings are constructed from woven threads, usually nylon or cotton. This is measured in TPI (Threads Per Inch). A low-TPI tire (e.g., 60 TPI) uses thicker, stiffer threads. These tires are incredibly durable, highly puncture-resistant, and feature stiff sidewalls. Because the sidewall is so stiff, it requires less air to support the rider.
Conversely, premium racing tires often feature high-TPI casings (e.g., 120 TPI or higher). These tires use microscopic, ultra-fine threads. The high TPI tire casing suppleness benefits are profound: the tire feels incredibly lively, fast, and plush. It conforms to micro-imperfections in the road surface almost magically. However, because the casing is so thin and supple, it lacks the structural rigidity of a low-TPI tire. Therefore, you may actually need to add 1 or 2 extra psi to a high-TPI tire to prevent the thin sidewalls from collapsing or squirming during hard cornering.
How to Find the Best Tire Pressure for Gravel Bikes: A Step-by-Step Guide
Now that we understand the physics, the rims, the weight dynamics, and the tire casings, it is time to put this knowledge into practice. Dialing in your pressure is an active, ongoing process.
Step 1: Utilize Advanced Digital Calculators
Gone are the days of squeezing a tire with your thumb to see if it feels "about right." The modern era provides fantastic algorithms to get you incredibly close to your ideal setup. Relying on SRAM AXS tire pressure calculator recommendations is arguably the best starting point available today.
Available online or via a smartphone app, the SRAM AXS calculator (and similar tools from Silca or Enve) allows you to input highly specific data: your exact body weight, bike weight, wheel diameter, tire width, rim internal width, casing type (standard vs. thin), and riding style (gravel, mixed, road). The algorithm instantly outputs an incredibly accurate starting psi for both the front and rear wheels.
Step 2: Invest in a Digital Tire Pressure Gauge for Accuracy
Having a calculated recommendation of 31.5 psi is useless if your equipment can't accurately measure it. Standard analog gauges attached to mechanical floor pumps are notoriously inaccurate. The gauge on a three-year-old floor pump can easily be off by 5 to 10 psi. On a road bike inflated to 90 psi, a 5 psi discrepancy is barely noticeable. On a gravel bike aiming for 30 psi, a 5 psi error represents a massive 16% margin of error, totally changing the ride characteristics.
To truly optimize your setup, you must invest in a standalone digital tire pressure gauge for accuracy. Brands like Topeak, SKS, and Silca make highly precise digital gauges. By inflating your tire slightly above your target with a pump, and then using a digital gauge with a bleed valve to tap the pressure down to the exact decimal point, you ensure absolute consistency every single time you ride.
Step 3: The Bracketing Method for Field Testing
Once you have your baseline pressure, it's time to hit the dirt. The ultimate way to fine-tune your setup is through a process called "bracketing."
Choose a short, 1-to-2-mile loop in your local area that features a good mix of everything you typically ride: a short paved section, a steep dirt climb, a loose gravel corner, and a rough, rocky descent.
- Run 1 (Baseline): Ride the loop at your calculated baseline pressure. Pay attention to how the bike feels. Does it chatter? Does it grip?
- Run 2 (High): Pump the tires up by 5 psi. Ride the exact same loop at the same speed. You will likely notice a harsher ride, less grip in the corner, and a feeling of bouncing over the rocks.
- Run 3 (Low): Drop the pressure 5 psi below your original baseline. Ride the loop again. You should feel supreme comfort and massive grip.
Step 4: Testing for Optimal Tire Drop and Traction
During that third, low-pressure run, you need to pay close attention to the negative side effects of going too soft. This is where testing for optimal tire drop and traction comes into play. "Tire drop" refers to the percentage the tire compresses under your weight. The industry standard target is approximately 15% tire drop.
If you drop the pressure too low, the tire will exhibit "squirm." When you stand up to pedal hard, or lean hard into a corner, the tire will feel like it is folding over itself or wandering side to side. Furthermore, if you bottom out on the rim during your test loop, you have gone too low.
The goal of bracketing is to find the exact threshold where you have maximum comfort and traction without bottoming out on the rim and without the tire squirming in the corners. Once you find that magic number, memorize it.
Adapting to the Long Haul: Variables and Adjustments
Your optimal tire pressure is not a set-it-and-forget-it metric. The best gravel riders constantly adapt their pressure based on the changing environment and specific events.
Adjusting Air Pressure for Mixed Surface Bikepacking
Gravel bikes are the undisputed champions of bikepacking and ultra-endurance touring. However, strapping bags to your frame completely alters your pneumatic ecosystem. Adjusting air pressure for mixed surface bikepacking requires a recalculation of your total system weight.
If you load a handlebar roll, a full frame bag, and a massive saddlebag onto your bike, you might easily add 20 to 30 pounds (9 to 13 kg) to your setup. Because your tires only care about total system weight, you must increase your psi to support this load.
Furthermore, bikepacking gear drastically shifts your weight distribution. A heavy saddlebag places a massive burden on the rear wheel. If you usually run 30 psi in the rear, adding a 15-pound saddlebag might require you to bump the rear tire up to 36 psi to prevent rim strikes on rough descents, while the front tire may only need a 1 or 2 psi increase.
Weather and Terrain Alterations
Even without extra gear, the route itself should dictate your daily pressure.
- Deep Mud and Wet Roots: Drop your pressure by 2 to 3 psi. The softer tire will dramatically improve traction on slippery surfaces.
- Sharp Flint and Razor Rocks: If riding in areas known for notoriously sharp rocks (like the flint hills of Unbound Gravel in Kansas), adding 2 to 3 psi will keep the tire casing taut, reducing the likelihood of a sharp rock slicing through a folded sidewall.
- Hero Dirt and Hardpack: If your gravel route is essentially smooth, packed dirt that resembles pavement, you can slightly increase pressure to minimize casing hysteresis and maximize sheer rolling speed.
The Impact of Tread Patterns on Pressure Sensitivity
While volume and width are the primary drivers of tire pressure, the actual tread pattern of your gravel bike tires also plays a nuanced role in how pressure changes feel on the trail. Gravel tires generally fall into three categories: slick/file-tread, semi-slick (smooth center with side knobs), and full knobby.
If you run a heavily knobbed tire—designed for mud and loose conditions—the knobs themselves provide a degree of suspension and bite. Lowering the pressure on a full knobby tire allows those aggressive side lugs to splay outward, dramatically increasing your cornering confidence on loose gravel. However, on hardpack, lower pressure with large knobs can make the bike feel incredibly sluggish, as the aggressive tread generates massive rolling resistance when compressed.
Conversely, if you are running a file-tread or slick gravel tire, your margin for error regarding pressure is much smaller. Because there are no mechanical knobs to grip the dirt, the tire relies entirely on the deformation of the casing (the contact patch) to generate friction and traction. Therefore, finding the absolute minimum safe pressure is paramount for slick tires off-road; a slick tire pumped up too hard is a terrifying, frictionless experience on loose gravel descents.
Dealing with Altitude and Temperature Swings
Gravel riding often takes us into the mountains, where environmental factors can sneakily alter your carefully calculated tire pressure mid-ride. According to the ideal gas law, air pressure is directly proportional to temperature. Furthermore, the gauge pressure of a tire changes relative to the atmospheric pressure outside of it.
If you inflate your tires to a precise 32 psi inside a warm, 70-degree Fahrenheit living room, and then drive up to a freezing mountain trailhead at 30 degrees, the cold air will cause the air inside your tires to contract. You could easily lose 3 to 4 psi simply from the temperature drop, plunging you into the "squirm" zone.
Similarly, massive elevation gains change the relative pressure. As you climb a 5,000-foot mountain pass, the atmospheric pressure around you drops, causing the air inside your tire to expand relative to the outside air, effectively increasing your tire pressure.
While you don't need to be a meteorologist to go for a bike ride, expert riders doing massive all-day events across changing climates often carry a highly accurate digital gauge on the ride with them. Bleeding out a pound of air at the top of a massive, hot, sunny climb before bombing down a treacherous descent is a pro-level move that ensures optimal grip when you need it most.
Summary: Mastering the Art of the Air Pump
Learning how to find the best tire pressure for gravel bikes is an evolving journey of testing, tuning, and adapting. It requires you to cast aside the outdated notion that a rock-hard tire is a fast tire. On the rough, unpredictable, and thrilling surfaces of gravel and dirt, a softer tire is a faster, safer, and infinitely more comfortable tire.
To recap the most critical steps for dialing in your ride:
- Calculate Your Baseline: Use digital tools and weight charts to find a starting point tailored to your exact body weight and tire volume.
- Acknowledge Your Equipment: Adjust your baseline based on your setup. Tubeless setups allow lower pressures; wide internal rims increase volume; high-TPI casings add suppleness but may require slightly more air for structural support.
- Measure Accurately: Throw away the cheap analog floor pump gauge. Rely on a dedicated digital gauge to ensure absolute consistency.
- Test and Bracket: Ride your local loop, tweaking pressures up and down until you find the sweet spot between supreme traction and unwanted tire squirm.
- Adapt to the Ride: Never hesitate to adjust your pressures for heavy bikepacking gear, severe weather, or uncharacteristically chunky terrain.
By taking the time to understand the complex but highly rewarding dynamics of gravel bike tires and pneumatic pressure, you unlock the true potential of your machine. You will float over washboard ruts, carve through loose, dusty corners with absolute confidence, and arrive at the end of epic 100-mile journeys feeling fresher than ever before. Grab your pump, drop your pressure, and go discover how fast and smooth your gravel bike was truly meant to be.