Everything you need to assemble your Mondince FM336 carbon gravel frame – no video required, just clear instructions and photos.
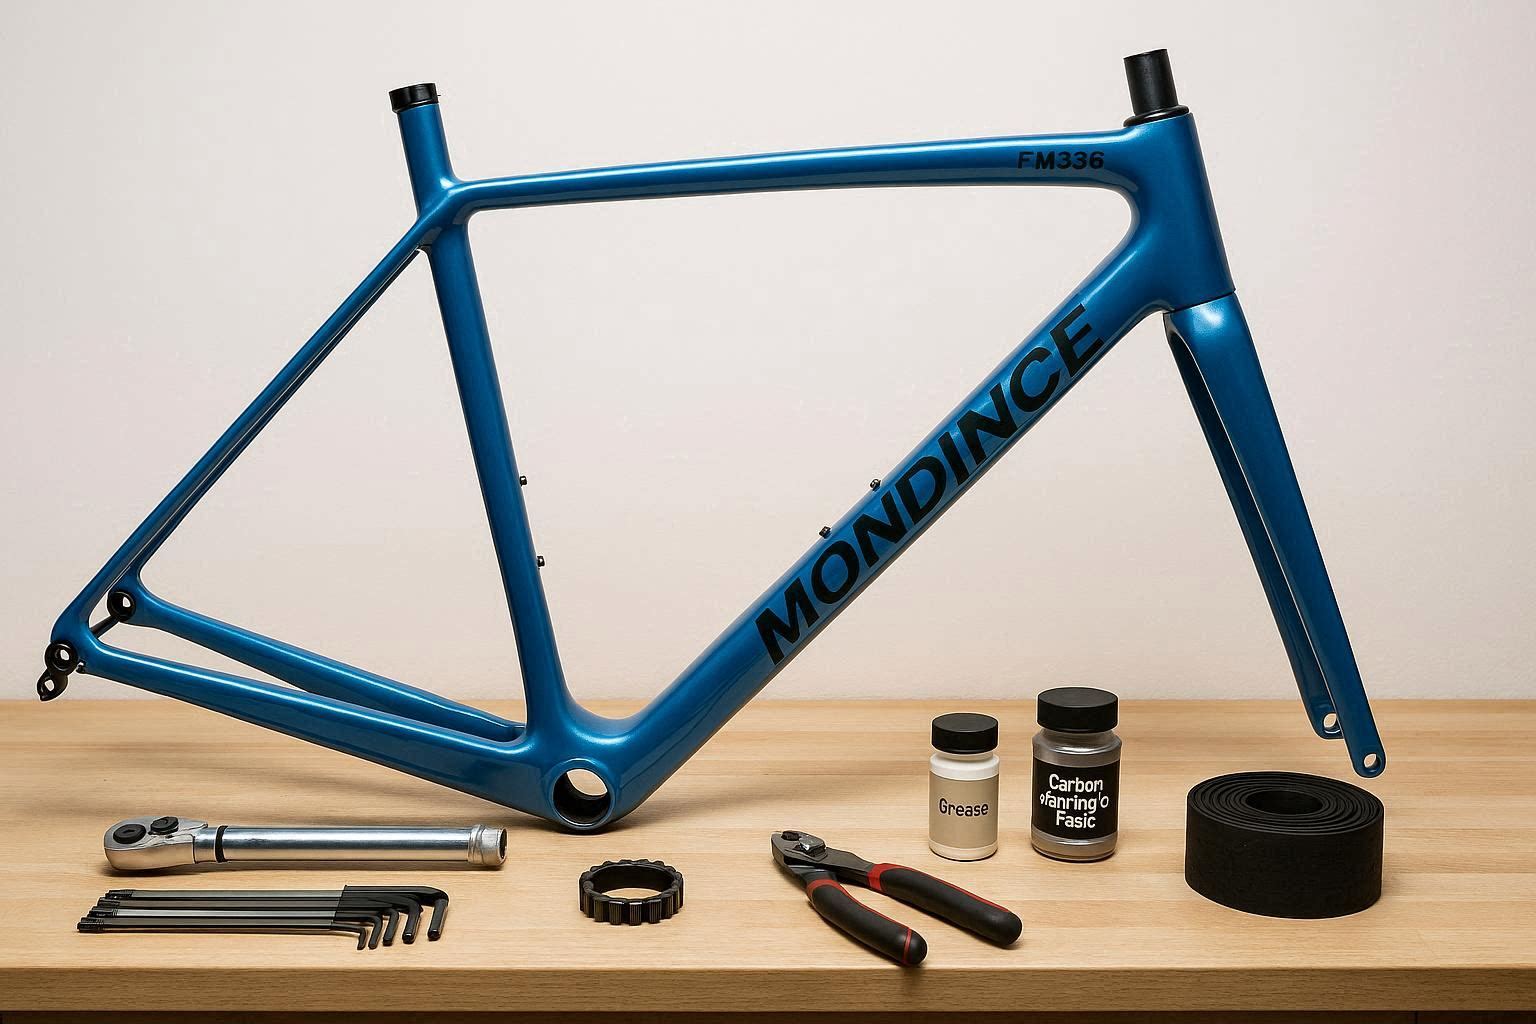
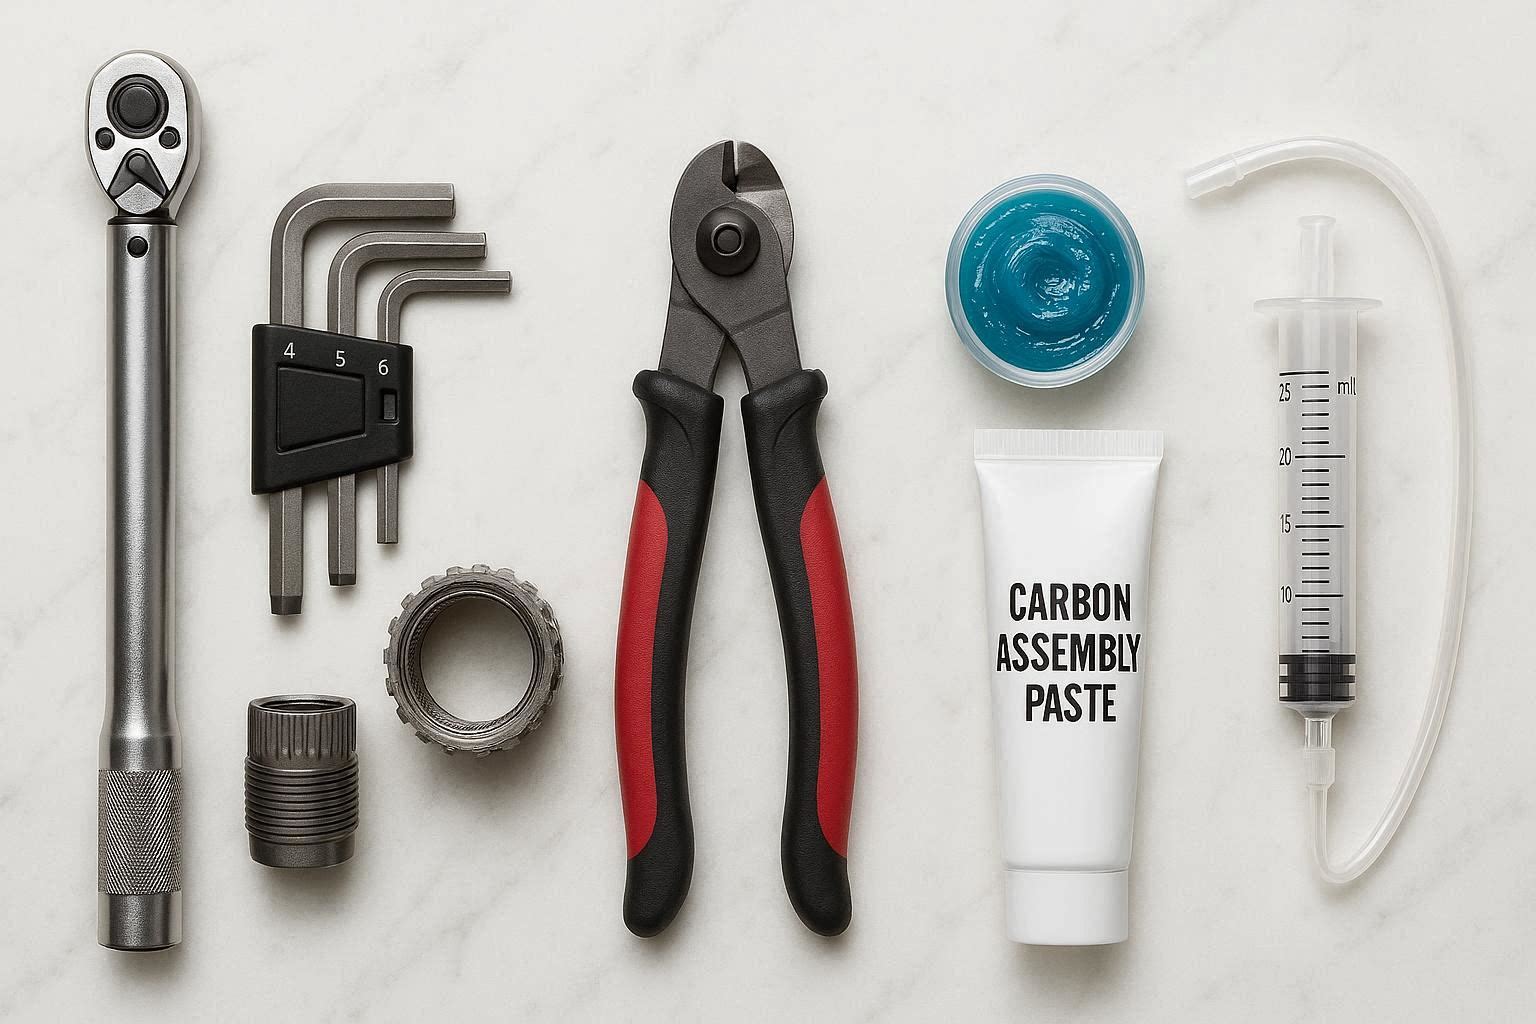
Tools You'll Need
- Torque wrench (4–10 Nm range)
- T47 bottom bracket tool (e.g., Park Tool BBT‑79)
- Internal routing kit or a magnetic cable guide
- Allen keys (4, 5, 6 mm)
- Cable cutters
- Grease & carbon assembly paste
- Hydraulic brake bleed kit (if using disc brakes)
- Scissors or side cutters for zip ties
Step 1: Unboxing & Inspection
Your FM336 frame arrives in a reinforced box with foam padding. Carefully remove the frame and inspect for any shipping damage: check for cracks, paint chips, and alignment of dropouts. Open and close the internal storage hatch a few times to ensure smooth operation.
Pro tip: Take photos of the frame before assembly – useful for insurance or warranty records.
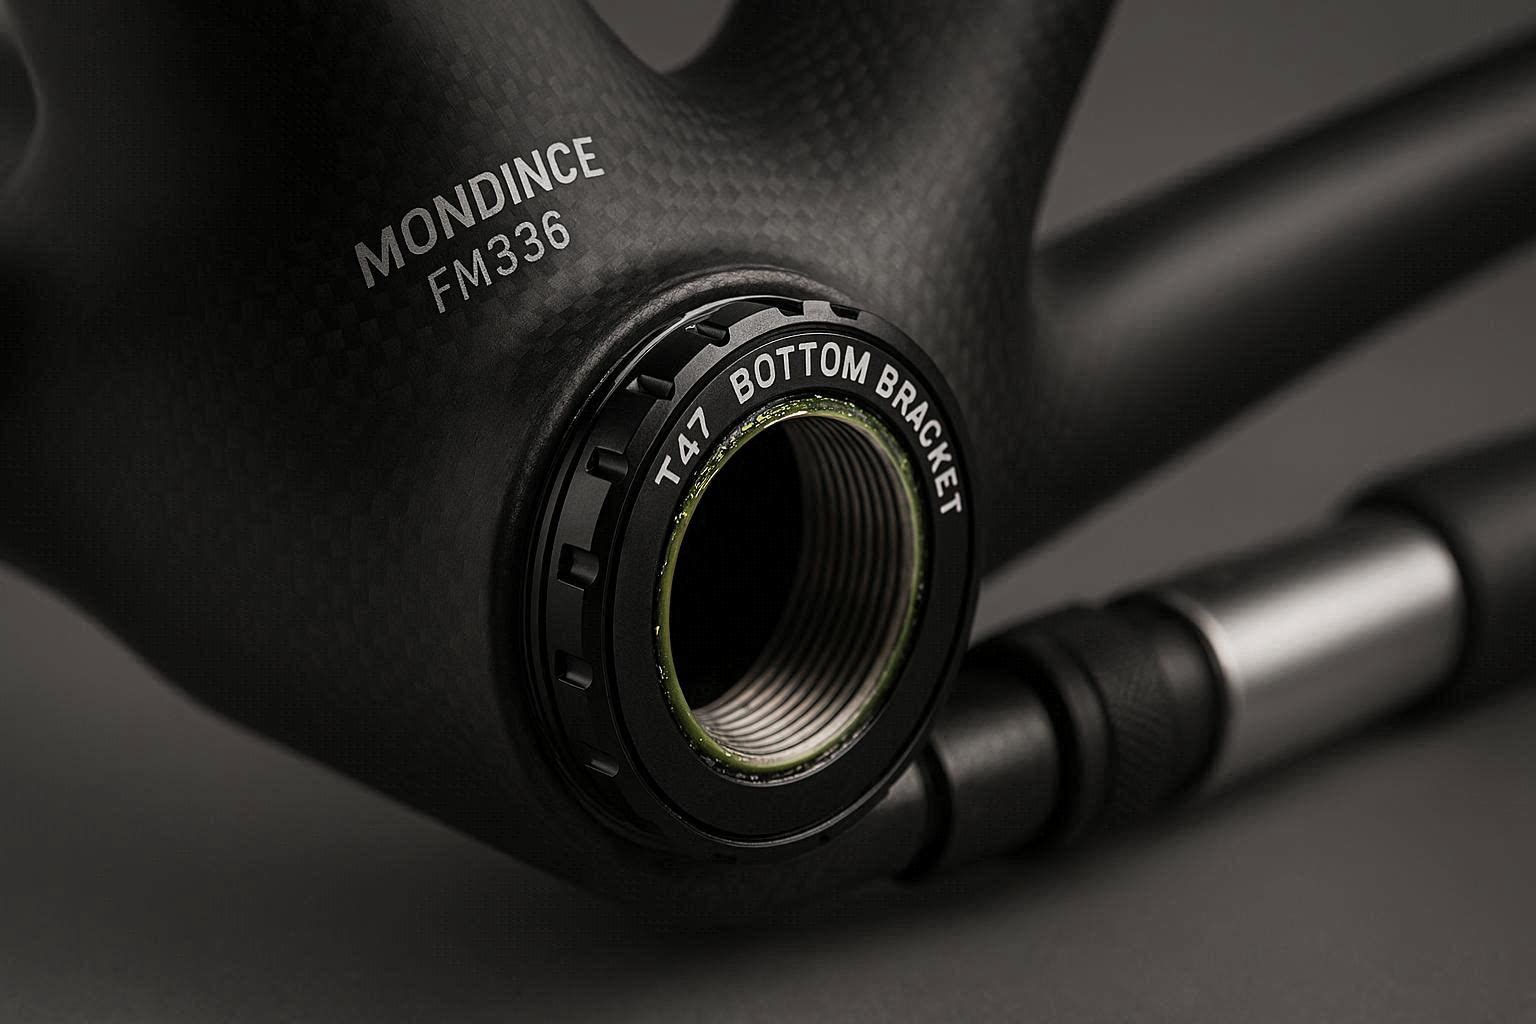
Step 2: Bottom Bracket Installation (T47)
The FM336 uses a T47 threaded bottom bracket. Apply a thin layer of grease to the threads of the bottom bracket cups. Screw them in by hand first to avoid cross‑threading, then tighten with a T47 tool to 35–40 Nm (follow your BB manufacturer's spec).
Common mistake: Forgetting to install the plastic sleeve between the bearing cups – this sleeve prevents dirt and water from entering the frame.
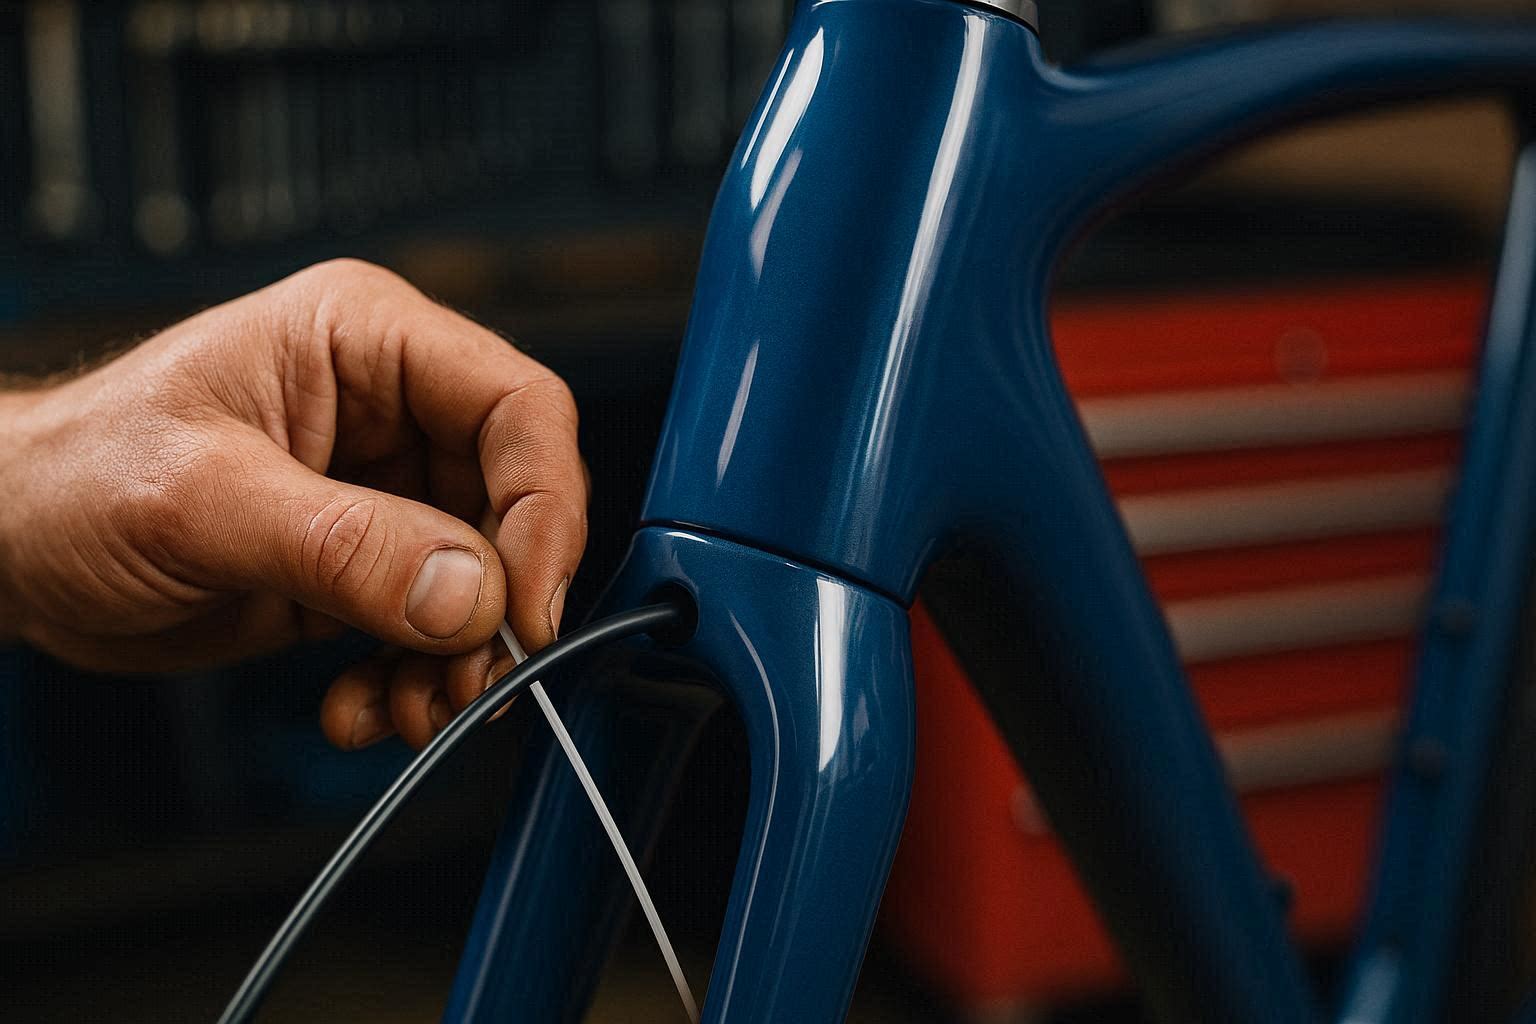
Step 3: Internal Cable Routing
The frame includes plastic guide tubes inside. Use a routing kit or a piece of thin string to pull cables/brake hoses through the downtube, chainstay, and top tube. If you're using electronic shifting (Di2 or AXS), you only need brake hoses – electronic shift wires are simpler to route.
Trick: Tape the end of the cable to a vacuum cleaner hose – the suction can pull it through in seconds.
Step 4: Fork & Headset Assembly
If the crown race isn't pre‑installed, tap it onto the fork steerer. Insert the fork into the head tube, then add spacers, stem, and top cap. Pre‑load the headset by tightening the top cap bolt (1–2 Nm) before clamping the stem. Rotate the fork to check for smooth movement – no play, no binding.
Step 5: Groupset & Brakes
Install the crankset – 24 mm spindle for Shimano, 30 mm for SRAM – into the T47 bottom bracket. Mount the front and rear derailleurs, and attach the brake calipers to the flat‑mount posts. If you have hydraulic brakes, bleed them following the manufacturer's instructions. For mechanical shifting, run housing along the downtube (using the internal guides for a clean look) and secure with zip ties if needed.
Step 6: Wheels, Tires & Tubeless Setup
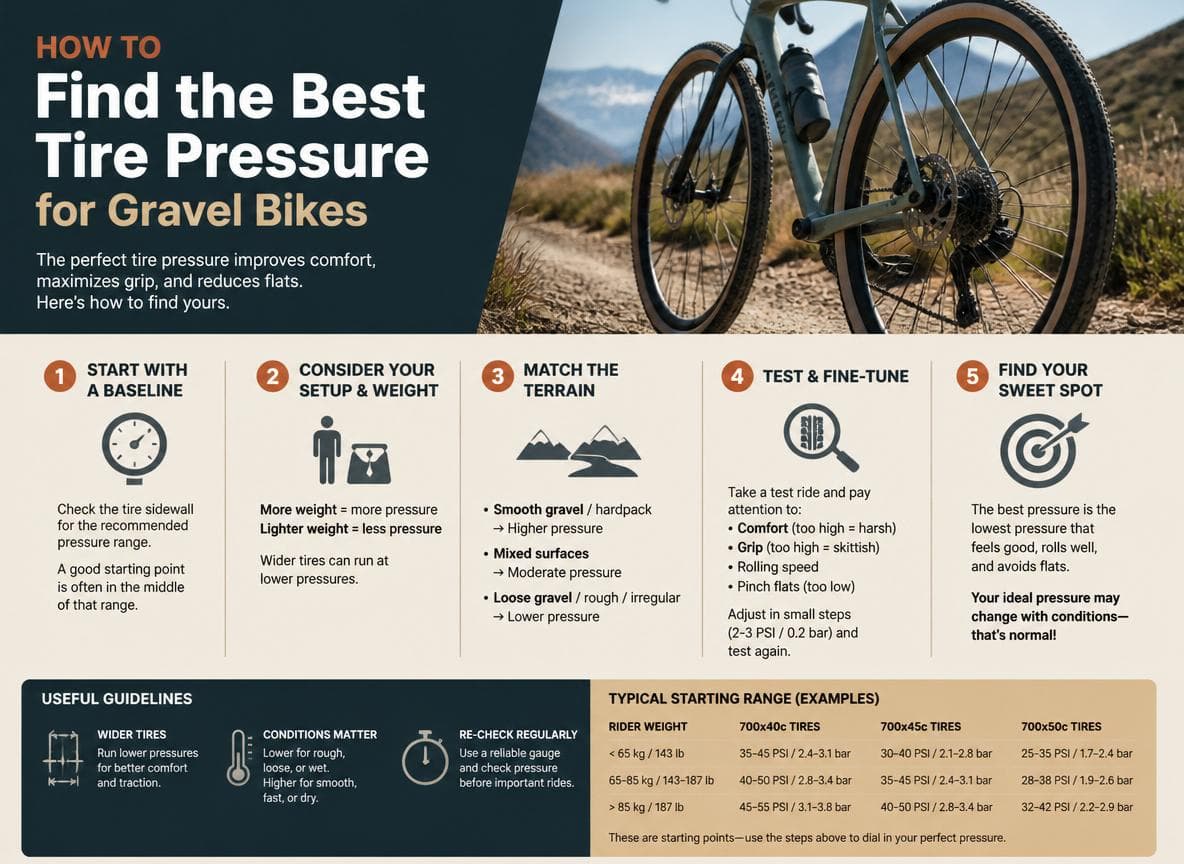
Mount tires up to the frame's official clearance (47 mm, though many users fit 50 mm). For tubeless, tape the rims, install valves, pour in sealant (approx. 60 ml per tire), and inflate to seat the beads. Use a compressor or high‑volume pump initially. Recommended pressure for gravel: 25–35 psi depending on rider weight and terrain.

Step 7: Cockpit & Finishing
Install the handlebar, stem, and seatpost. Apply carbon assembly paste to the seatpost and handlebar clamp areas to prevent slipping. Torque all bolts to manufacturer specs:
- Stem faceplate bolts: 4–6 Nm
- Seatpost clamp: 5–8 Nm
- Handlebar clamp (if separate): 5–6 Nm
Wrap the handlebar tape, adjust the saddle height and fore/aft position, then double‑check every bolt.
First Ride & Break‑in Tips
- Start with a short 5‑10 km ride on smooth terrain.
- After the first ride, re‑torque all bolts – carbon can settle.
- Listen for creaks; if present, re‑apply grease/paste on the affected interface.
- Enjoy your custom‑built FM336!
Frequently Asked Questions
Do I need a T47 specific tool?
Yes – a T47 bottom bracket tool (e.g., Park Tool BBT‑79) is required for proper installation. It's affordable and widely available.
Can I run mechanical shifting externally?
The frame is designed for internal routing, but you can run housing externally using zip ties. However, internal routing is cleaner and well worth the effort.
What's the hardest part of the build?
Internal cable routing is the most time‑consuming step. Using a magnetic guide or the vacuum trick makes it much easier.
Does the frame come with a headset and bottom bracket?
The frame includes the headset bearings and a T47 bottom bracket (unless you order without). Check the product page for details.
Need Help?
If you get stuck, our customer support team is available via email or WhatsApp. We also offer custom build services for brands and individuals.
Ready to start your FM336 build? Order your frame today.