Choosing the right bike frame size is the single most important factor for comfort, efficiency, and injury prevention. A frame that’s too large or too small can cause back pain, knee strain, and poor handling. In this guide, we’ll show you exactly how to measure a bike frame – whether you have a road, mountain, hybrid, or gravel bike.
⚡ Quick Answer – In 30 Seconds
Standover height (your inseam) is the simplest check. For road bikes: inseam × 0.67 = approximate frame size in cm. For mountain bikes: inseam × 0.59 = frame size in inches. Then verify using the top tube length and seat tube angle. Jump to Size Calculator →
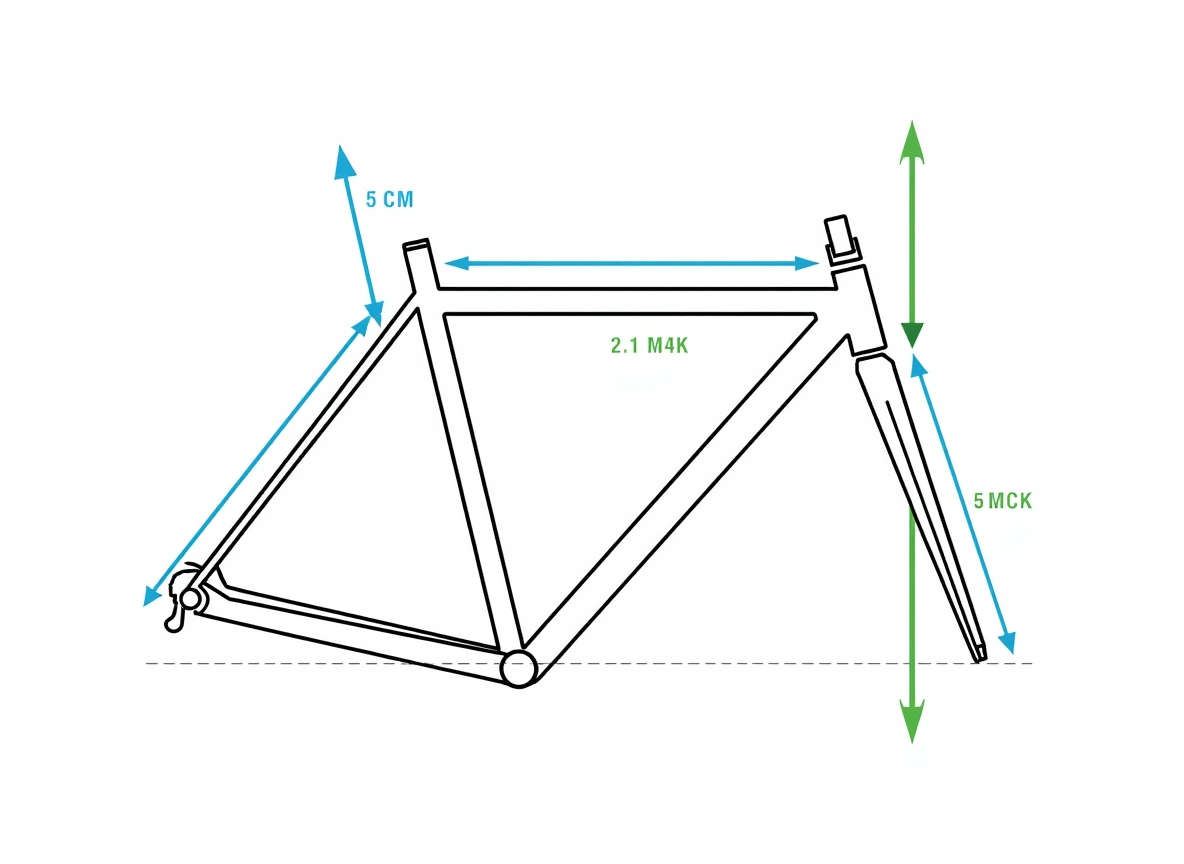
Understanding Bike Frame Geometry – The Key Terms
Before measuring, you should know a few basic parts of the frame. These terms appear in every manufacturer's geometry chart:
- Head tube – the vertical tube at the front that holds the fork. A taller head tube gives a more upright position.
- Top of the seat (seat tube top) – the point where the seatpost inserts. The distance from the bottom bracket to this point is the seat tube length, which traditionally defines frame size.
- Top tube length (effective reach) – the horizontal distance from head tube to seat tube. This greatly affects reach.
- Bottom bracket drop – the vertical distance from wheel axles to the bottom bracket; affects stability.
- Chainstay length – influences wheelbase and climbing traction.
Modern bike sizing also depends on the type of bike – a road bike will have a longer reach, while a hybrid or comfort bike has a shorter reach.
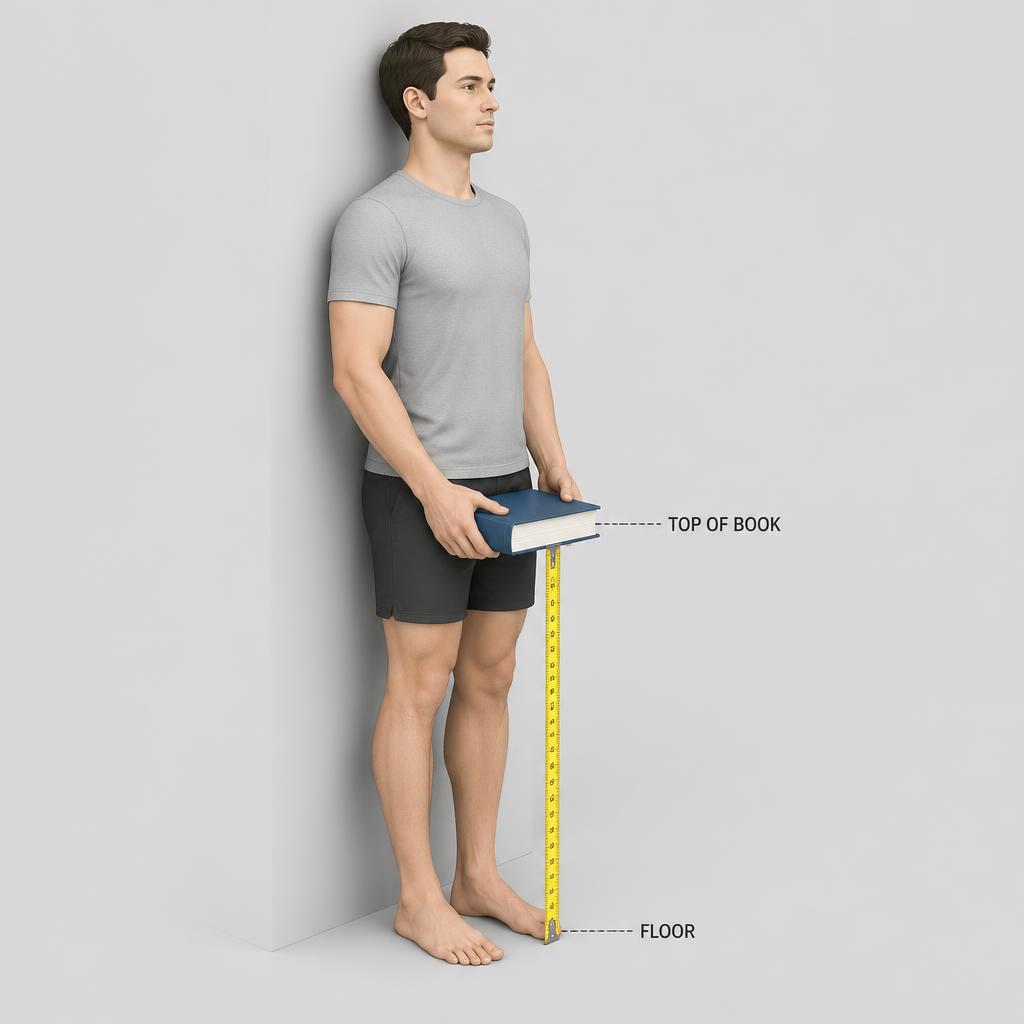
How to Measure Your Inseam (Most Important Step)
Your inseam determines the frame size you need. Follow these steps accurately:
- Stand against a wall with bare feet about 6 inches apart.
- Place a hardcover book between your legs, spine upward, as if sitting on a bike saddle.
- Pull the book up snugly against your crotch (apply slight pressure like a saddle would).
- Measure from the floor to the top of the book – that’s your inseam length in cm or inches.
- Repeat twice and take the average.
Measuring a Road Bike Frame
Traditional road bike sizing uses the seat tube length (center-to-top or center-to-center). However, modern “compact geometry” frames make top tube length more reliable.
Method 1 – Based on Inseam
Frame size (cm) = Inseam (cm) × 0.67 (for traditional road geometry). For example, if your inseam is 82 cm, the ideal frame size is 54–55 cm.
Method 2 – Top Tube Reach
Sit on a bike with level cranks (pedals horizontal). Have a friend measure from the tip of your saddle to the center of the handlebar stem. The ideal reach should allow a slight bend in your elbows (15-20°).

Measuring a Mountain Bike Frame
MTB frames are sized in inches (Small, Medium, Large) or sometimes by the seat tube length. Use this formula: Frame size (inches) = Inseam (inches) × 0.59.
For a more accurate fit, refer to the reach and stack numbers. Modern trail and enduro bikes have longer reach for stability, while XC bikes have shorter reach for agility.
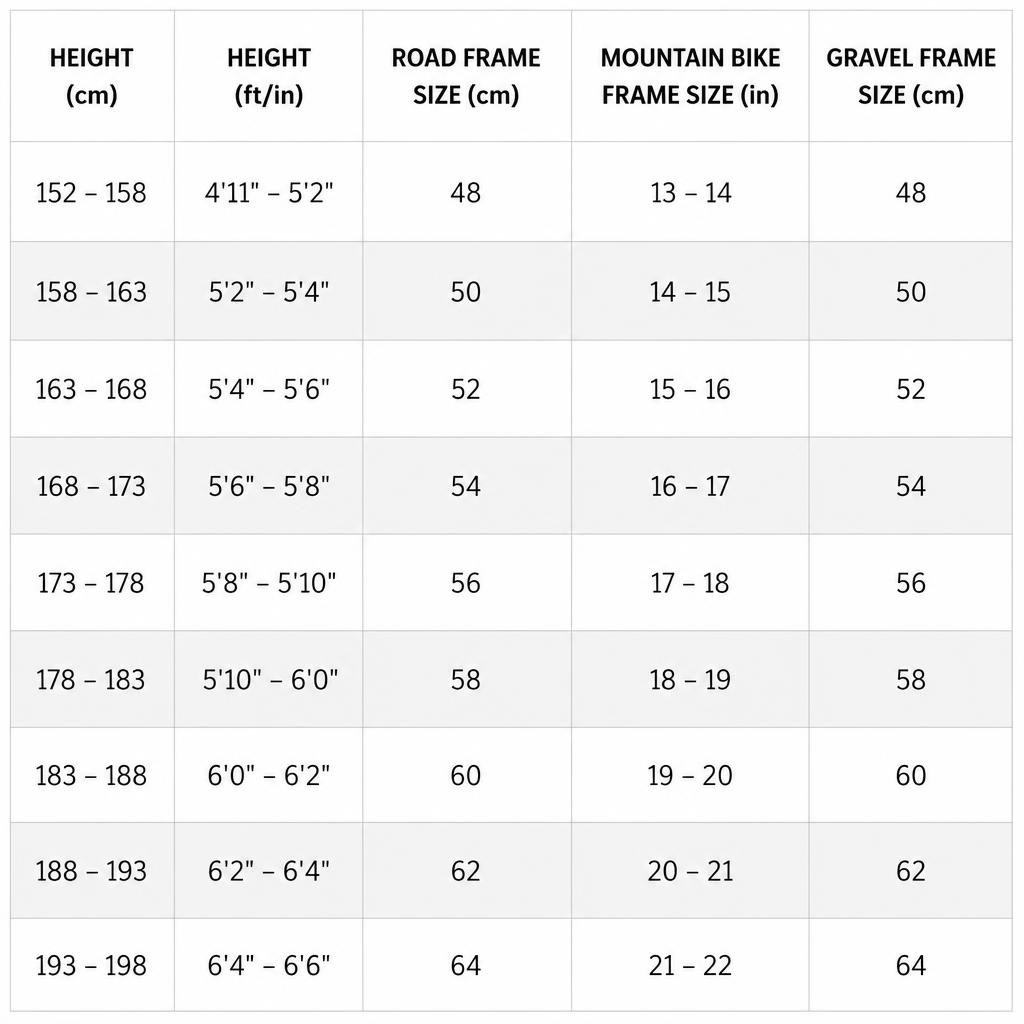
| Height (cm) | Height (ft/in) | Road Frame (cm) | MTB Frame (inches) | Gravel Frame (cm) |
|---|---|---|---|---|
| 152–160 | 5'0" – 5'3" | 47–49 | 13–14" (XS) | 48–51 |
| 160–168 | 5'3" – 5'6" | 49–51 | 14–16" (S) | 51–53 |
| 168–175 | 5'6" – 5'9" | 51–53 | 16–17" (M) | 53–55 |
| 175–183 | 5'9" – 6'0" | 53–56 | 17–18" (L) | 55–57 |
| 183–190 | 6'0" – 6'3" | 56–58 | 18–20" (XL) | 57–59 |
| 190–198 | 6'3" – 6'6" | 58–61 | 20–22" (XXL) | 59–61 |
How to Measure a Frame You Already Own
If you want to check a current bike’s frame size, here’s the correct way:
- Seat tube length – measure from the center of the bottom bracket (crank axle) to the top of the seat tube (where seatpost inserts). Many road frames use “center-to-top” (C-T).
- Top tube length – measure horizontally from the center of the head tube top to the center of the seat tube top (along the top tube). Ignore any slope.
- Standover height – place the bike on the ground, stand over the top tube near the middle, and measure the clearance between the frame and your crotch. You should have at least 2–5 cm clearance for road bikes, 5–10 cm for mountain bikes.
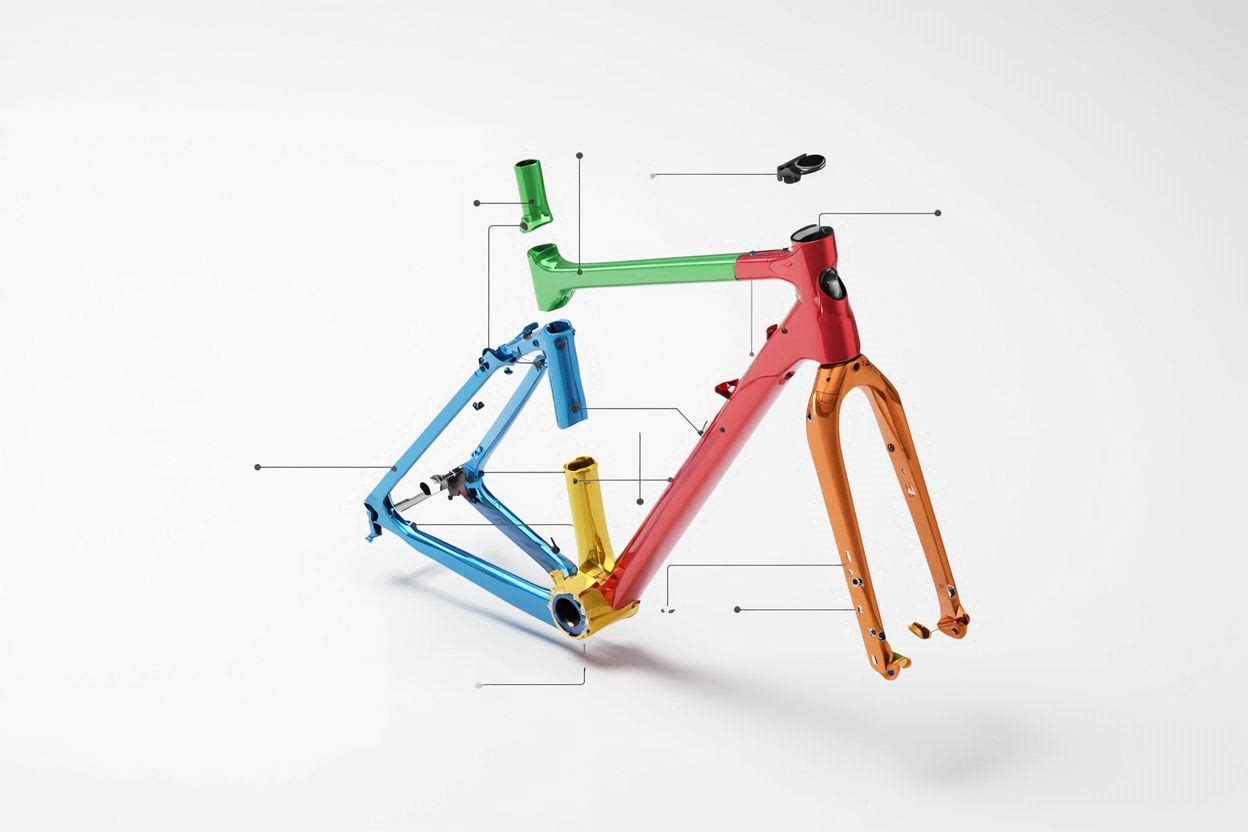
For detailed geometry, refer to the manufacturer's spec sheet. At Mondince Cycle, all our carbon frames come with a full geometry chart.
Common Mistakes to Avoid
- Selecting based on height only – leg length and torso length vary greatly. Always use inseam first, then adjust reach with stem length.
- Ignoring standover height – especially for mountain bikes, a frame that doesn’t clear your crotch can be dangerous.
- Thinking “one size fits all” – different riding styles need different sizes. A racer may size down, a bikepacker may size up.
- Not testing reach – a frame that feels good in the shop may be too long after an hour of riding.
Frequently Asked Questions About Bike Sizing
Can I ride a bike that’s one size too small?
What if I am between two sizes?
Do women’s bikes have different sizing?
How do I measure my child for a bike?
Interactive Bike Size Calculator (Coming Soon)
We are building a dynamic bike size calculator – enter your inseam, height, and bike type, and get an instant recommended frame size. In the meantime, use the chart above or contact our team for personalized advice.
Related Products by Mondince Cycle
Once you’ve determined your frame size, explore our high-performance carbon frames:
All frames are available with custom geometry – learn about OEM services.